Virtualization and remote desktop technologies have become a new normal when working from home or a distant place. Third-party software such as Team viewer, AnyDesk, VNC, etc., are some of the prominent names in this area. While all of them provide some great features, they need to be installed separately and have their authentication method. Then there is Microsoft’s native Windows remote desktop client. It has an easy interface and requires just an IP address of a remote PC to connect.
Windows Remote desktop application works well in a local environment, and the process is relatively easy. But what many people don’t know is that it can be used to access and control a remote Windows PC or server.
There are two methods to access Remote PC using Windows Remote desktop application. The first method is relatively easy, while the other can be tricky and require an additional hardware component.
Things to check before using Windows Remote Desktop
- Systems running Microsoft Windows 10, Windows 7, Windows Vista, Windows XP, Windows Server on both ends of the connection.
- (Bonus) You can also control a remote Windows computer with your Android or Apple smartphone. Of course, you would still need to follow the steps mentioned in Method #2 of this guide.
You may also like – How to Control Android from PC using TeamViewer
- If you follow method #2, then a router supporting Port forward functionality on the remote PC side would be required. If you are not sure about port forwarding functionality then, please head over to Portforward.com and check for your router in the list.
- On the remote PC, open Computer properties and go to Advanced System Settings. Click on the Remote tab. Under Remote Desktop, select ‘Allow remote connections to this computer‘.
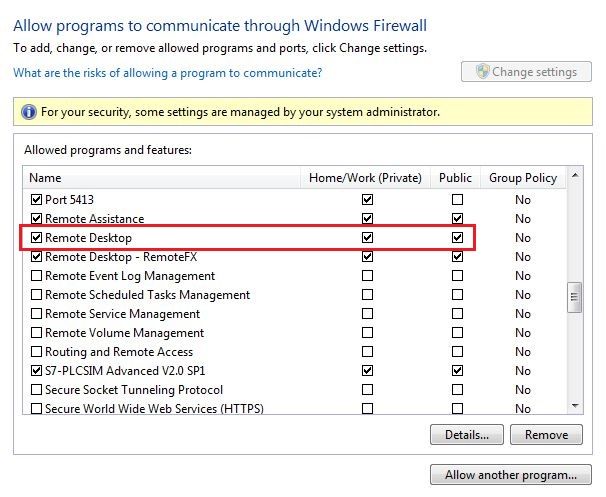
- Open Control Panel -> Windows Firewall and on the left side, click on ‘Allow an app or feature through Windows Defender Firewall’. Tick Remote Desktop application as shown in the image below.
Two Ways to control Remote PC using RDP Client
When it comes to accessing a remote PC, there could be many ways. As I mentioned earlier, we have listed two simple and best methods to achieve the same.
The first way is to use a VPN client. What it does is, it will connect your local PC and the remote PC to a private network through a VPN tunnel. And the second method requires remote PC users to have a router with the port forward functionality.
Method 1 – VPN Client Hamachi for Creating a Private Network
Hamachi is software with which a remote and a local PC user can create/join a virtual private network (VPN). Once you connect to Hamachi servers, all of your internet traffic will route through a private and secure network. This setup is as good as connecting PCs in a LAN network.
Another advantage is that none of the machines is exposed to the internet directly. Thus, there is no chance of data breach or hacking.
In this method, we will discuss how to install Hamachi and configure Hamachi for establishing a connection between two or multiple Windows machines.
Hamachi Download and Installation
Step 1 – Download LogMeIn Hamachi VPN software for Windows. Install it on both local and remote PC.
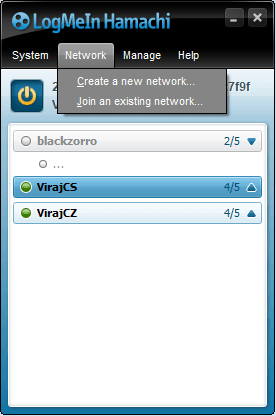
Step 2 – Upon installation, Hamachi will create a virtual network adapter named ‘Hamachi’ on this path – Control Panel -> Network and Internet -> Network Connections. Now, Run the Hamachi application and turn on the VPN button. Once you do that, then on the top side, you should see your Hamachi IP.

Note – For Windows 7 users, if you don’t see the Hamachi adapter installed or can’t get it working no matter what you do, then worrying is the last thing you should do because we have already got you covered on that. Download Windows update KB3033929 and re-install the Hamachi.
Creating and Joining a Hamachi Network
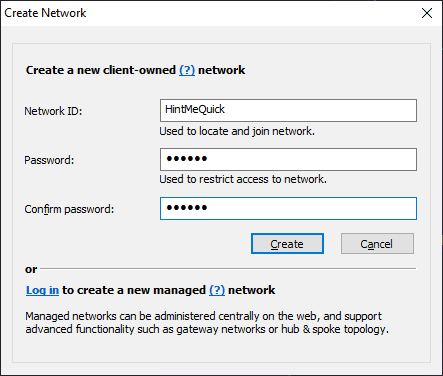
Step 3 – Create a new network and assign it a name and a password. If you are not a member, then Hamachi will ask you to sign up.
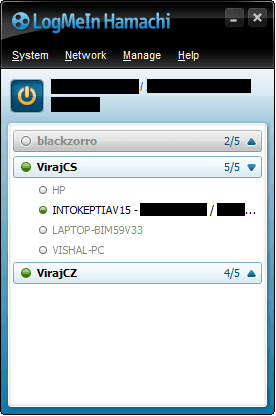
Step 4 – On remote PC, open Hamachi and join the network you have created on the local PC. Upon entering, the remote PC name would be visible under the network along with the green dot.
Note – There is a limitation on the number of peers connecting to a single network. As you can see in the image above, Network VirajCS has five members, which is the max limit for a free LogMeIn account. Fortunately, there is a way to overcome this limitation. Create multiple networks, and then you can add several remote PCs into those networks.
Connect Windows Remote Desktop
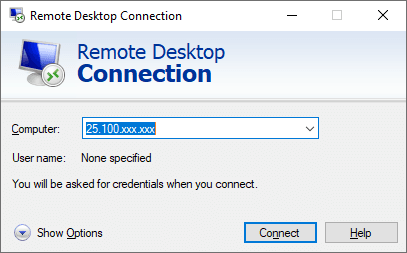
Step 5 – Open Remote Desktop Connection App on the local PC. Type the Hamachi IP of the remote PC in the IP address field and hit connect.
There you go! Who thought accessing a remote PC using Windows Remote Desktop client (RDP) over the internet could be this easy, right?
Now that you know the process, you can create multiple networks in Hamachi and add numerous members to them. By doing so, you can access any network PC remotely, provided the remote desktop access settings are set to ‘allowed’ for incoming connections.
Method 2 – Router Port Forwarding
Router port forwarding is yet another way for accessing particular services of a remote PC. In this process, we expose an application-specific port to the internet.
Some of the applications have a predefined port number. When an outside user wants to access the data of that particular application, they have to use this specific port number.
Let’s take an example of the worldwide web. All of us use the internet and browse through different websites. These websites, you see, use hypertext transfer protocol (HTTP) to serve their content. When I say serve content, it automatically means that they store their website data on some server, and you are accessing that data. And as I said earlier, there needs to be some port responsible for exposing data to the outside world, and for HTTP, the port number is 80.
When you type a website URL in the browser, it sends a request to port 80 of the server, on which the website is hosted. In return, port 80 or port 443 (if it’s HTTPS) serves the website content.
The port number is not visible to users because when you enter an URL, the browser automatically decides which port to access based on the protocol you type and simply masks it.
Now, try this – Open the internet browser and enter https://www.hintmequick.com:443. When the site loads, you’ll see that the browser has removed or masked the 443 part.
Similarly, in the case of Remote desktop, the port used for communication is 3389. And with this method, we will configure the router to port forward whenever there is an incoming remote desktop request.
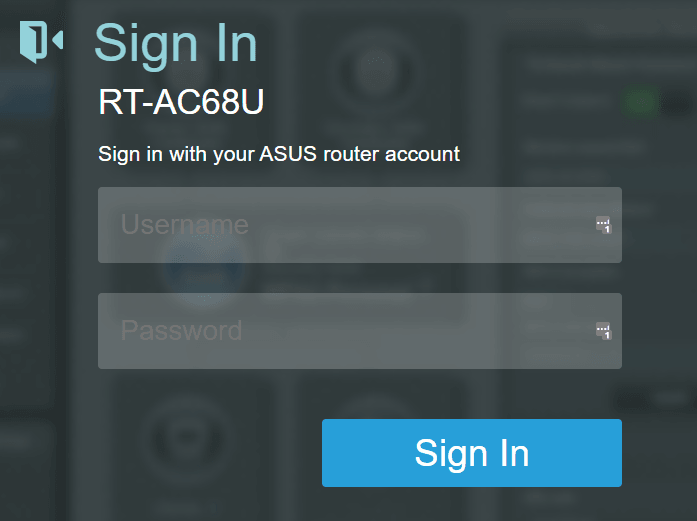
Step 1 – On the remote PC side, open the router configuration page by hitting http://192.168.1.1. The address may vary with the router manufacturer. You can visit portforward.com and select your router model to know the exact IP address.
Enter the default username and password if you haven’t changed it before. In this case, I am using an ASUS router. The default username for this router is admin, and the password is password. You can find default credentials for your router on portforward.com or do a google search for the same.
Step 2 – Find the port forwarding setting. Mine is located under WAN –> Virtual Server / Port Forwarding.
Step 3 – Add a port forwarding profile as below. Find a setting called external port or similar and enter 3389.
While entering an internal IP, you’ll have to enter your local area network IP assigned by the router. If you don’t know how to find an internal IP address, please go through this guide. Save the profile and reboot the router for settings to take effect.
Step 4 – To check if you have successfully opened the port. Go to a port checker website and enter your public IP address and 3389 in the port field. You can get the public IP by searching ‘my ip’ on Google.
If the result is open, then it’s time for a bit of dance.
Note – Port forwarding only works if your router’s WAN IP matches your public IP. If your home router is behind any other router, then the port forwarding needs to be configured on the primary router.
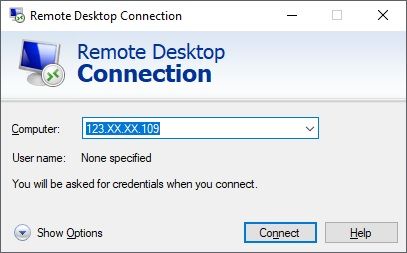
Step 6 – Till Step 5, we were dealing with the remote PC side. Now, on a local system, open the remote desktop application, and enter a public IP address of Remote PC, and hit connect.
Step 7 – Enter the Windows user account credentials of a remote PC user. And that’s it! You will see a screen of Remote PC appearing on your desktop.
Let me know how this guide worked for you. Do drop a comment in case if you need any help. Cheers!





everytime I use hamachi for Microsoft remote desktop all I get is a black screen.
What do?